Partial Payment

A couple of customers requested a feature that enables them to accept a partial payment. A partial payment is useful when you want to allow your Members make payment using the combination of cash, check, bank transfer and credit card.

To make a partial payment, go to Invoices page and select an invoice. Then click “Mark as Paid” menu on the right.

Enter the amount of payment you received from your Member in the form of cash, check or bank transfer. The status of invoice won’t change to ‘Paid’ until the invoice is fully paid.

When your Members make payment to the invoice online, they see the paid amount as part of the invoice like below. A payable amount is what they have to pay for since they already made a partial payment to the invoice.

Issue Invoice to Non-Member

As usual, today we added new feature that has been requested by a number of customers for quite some time. That is the ability to issue an invoice to non-Member.

With this feature, you can handle the cases like someone wants to book the conference room for 2 hours or charging an event organizer who is not a Member for one-time event at your venue.

To issue n invoice to non-Member, go to Invoices page and click a “Add Invoice” menu on the right. Now that you are able to choose ‘Guest’ rather than existing Members. Click ‘Add’ button to proceed.

image

On the next screen you can enter the name and company of non-member as usual. Click “Add Invoice” button when you are done.

image

Unfortunately there are a couple of drawbacks when issuing an invoice to non-Member.

1) You cannot send an invoice to non-member using email.

This is because the invoice email contains a link to make payment and the link requires a member to log-in, which is not possible for non-members at the moment.

2) You cannot use built-in payment methods to receive a payment.

Same above. Instead, you can download the invoice as PDF and send the email to non-member along with the instructions for making payment using PayPal. You only need to tell him a PayPal-enabled email address that you own. You can receive payment using other methods such as cash, check or bank transfer if you wish.

3) You cannot assign a customer number to non-member.

A customer number is unique identifier that is auto-generated when new member is created. Because this is part of membership information, you cannot assign a customer number to non-member. Hence, it does not appear in the invoice issued for non-member.

PDF Download for Invoices

We are adding new features at a rapid pace these days. For those who asked this feature, thanks for the wait. Now that you can download your invoices and save them as PDF.

Go to Invoices page and click a “Download PDF” menu. There you can specify the date range and file forma: Combined and Separate. The former concatenates all invoices into one PDF file, and the latter generates one PDF per invoice and bundles the PDF files in a single zip file.

You can also download a single PDF. Go to Invoices > [Invoice Number] page and click a “Download PDF” menu on the right. This generates a single PDF file of the invoice that you are looking right now.

With this feature available at your fingertips, you can keep all invoices offline for later reference or send individual invoice to your Member using PDF attachment.

New CSV Exporter for Invoices

Recently we had a number of customers asking for better integration with their accounting software using a built-in CSV exporter so we reworked on that.

Go to Invoices page and click a “Download CSV” menu as you see in the below screenshot.

There, you can specify the date range and data format. This time we implemented two data formats: Invoices and Items. The former contains one invoice per row and the latter contains one item per row.

With a generated CSV file you may import invoice data into your accounting software such as QuickBooks as well as any external system that you are using.

If you need more advanced, more automated integration with your accounting software, please contact us. We can do that for you at additional one-time development fee.

More Automated Member Sign up Flow

Accepting new Members became much easier.

Now that new Members can sign up themselves through a frontpage without requiring you to do anything. They visit your frontpage (e.g. https://coworkify.com/yourspace), click on “Sign up” button, pick a start date, and create an account or sign in with the existing account.

Below is an example of the frontpage showing new “Sign up” buttons.

image

When Members click on “Sign up” button, they will be asked to pick a start date.

image

Then, they can either create new account or sign in with their existing account as below.

image

Finally, new Members are asked to agree with the plan conditions and terms.

You will be informed when new Member signs up. This automates the entire onboarding process without you entering the detailed information about new Members.

You can also temporarily hide a certain plan on the frontpage and stop accepting new Members for that plan. This is useful when your monthly memberships are fully occupied and you want to stop accepting new Members until the memberships become available.

Stripe Support

image

As we have more customers from the US and Europe, we were receiving more feature requests that are specific to these regions. One of them was a support for Stripe.

Stripe is widely used by many web based services and it is probably the simplest way to accept payment via credit card for the businesses located in the US and Europe.

While integration work itself was relatively easy for us, we had our own reason for why it took a while to implement this feature. As you may already know, we are located in Japan and Stripe is not available in our country just yet.

This made our testing process in the production environment a bit difficult, but it’s finally here.

In order to connect to your Stripe account, go to Settings > Payment Methods page and click on “Add Stripe” button as shown below.

image

Then you will be navigated to Stripe website where you confirm that you give us a permission to access your account data.

From Members perspective, they now have additional payment method when they pay their invoices. Members can make payment using their credit card and the money goes straight to your Stripe account. We don’t take a cut. The money is all yours.

See the below screenshots as an example.

image
image

New Pricing Model

At Coworkify we are working hard every day in order to make our software more affordable and usable to every space owner who needs a management solution.

The reason why we are doing this is that we strongly believe coworking can give so much freedom to the people in terms of their work-life balance and that we’ve seen for the past 3 years a huge growth in the number of people who switched from traditional working environment to coworking in almost every country where we provide our services.

With more coworking spaces being created, we were often asked by the space owners for a pricing that just fits their needs. A typical question we receive reads like this. “Hi, Coworkify. Do you provide custom pricing just for XX number of members?”

So starting from today, we introduce two new plans for the space owners who need an intermediate pricing. New plans can be found at our pricing page.

At the same time, we removed an unlimited plan. This is because the space that has more than 150 members usually require lots of custom development effort like printer management integration, which enables prints billing to be automatically added to the corresponding invoice. Hence, most of the time a quote varies a lot.

As always we listen you, a customer. Please send us feedback and let us know what you think.

Coworking Events for 2015

Coworking magazine Deskmag published a list of major coworking events that will take place in 2015. We thought it’s worth sharing it so here it is.

We might attend some of these events or even sponsor a few, but who knows. Which event will you attend?

PayPal Express Checkout Integration

One of the most frequently asked features from our customers was better integration with PayPal.

Until now, the only way to accept payment from your Members using PayPal was to use REST API, which requires a business PayPal account and you had to use PayPal’s Developer website in order to get API credentials. This wasn’t the easiest way for some customers.

Now that we’ve added a PayPal Express Checkout integration. With this integration, you can simply click on “Add PayPal Express Checkout” button in Settings page and then you will be navigated to PayPal website where you give a permission to Coworkify so that it can collect money on behalf of you.

It’s just a matter of few clicks and much easier to use. See the image below showing new Settings page.

image

When your Members receive an invoice issued by Coworkify, they can choose to pay using PayPal by clicking on a “Check out with PayPal” button. Below is a sample screenshot when you enable PayPal Express Checkout.

image

Spend less time on invoicing and collecting payments

As a space manager, Invoicing and collecting payments are definitely one of the most time consuming tasks in terms of day-to-day operations.

Despite the fact those tasks require many hours to finish (or sometimes days depending on number of members), the issued invoices often contain human errors.

For example, overcharging, undercharging, forgetting tax, duplicate invoices are the common errors we’ve seen at lots of spaces.

You want to minimize time spent on these unproductive tasks as much as possible. Instead, you should spend time on more meaningful tasks like community building because people are the most important asset for successful coworking.

With Coworkify, you can let our software to issue a personalized invoice and collect payment on behalf of you. It can offload large amount of time from you and enable you to become more productive.

There are two ways to do so. The first way is fully automated. In fact, you don’t have to do anything at all. You just add a member and assign a plan to that member. Coworkify does the rest for you.

At invoicing day, which is 20th of every month as default, Coworkify calculates recurring charges, hourly charges of booked resources (e.g. conference room), and any option that member is subscribing (e.g. locker), creates a personalized invoice, and sends it to member via email.

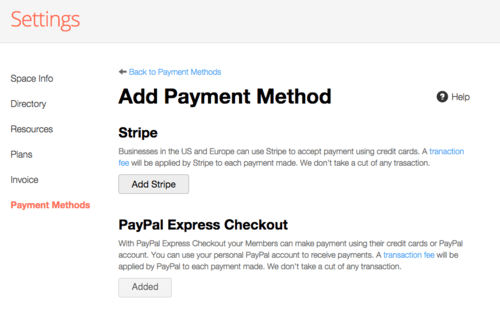
Once member receives the invoice, he/she can make payment with the payment methods specified by you. If you set up PayPal as payment method, then Coworkify confirms payment and marks it as paid automatically when payment is made.

The second way is manual. You can create new invoice from scratch and add whatever items there. This is useful when you want to issue a non-recurring invoice to member.

Either way, Coworkify can automate the entire process from issuing invoice and collecting payment for you.

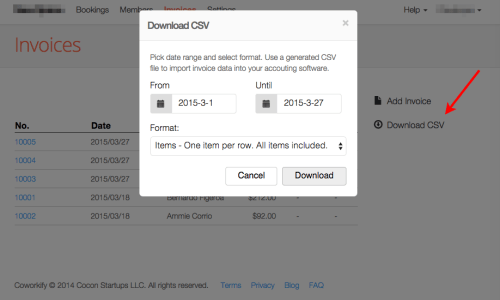
Below is an example of invoice issued by Coworkify.

if you have any feature request, send us email at support@coworkify.com or give us feedback on our forum.

image